
Hmac Based Authentication
Available starting Taurus-PROTECT 3.20
This article covers
- A high level understanding of what HMAC authentication is.
- When to use HMAC authentication and how it differs from the Bearer authentication.
- Familiarity with how Taurus implements HMAC including which fields we sign and how to generate the headers.
- How to use the Java example SDK to create an API client that encapsulates HMAC authentication
- A proxy server as additional examples in Python and C#
- An HMAC authentication script for the popular Postman API client.
Introduction
HMAC (Hash-based Message Authentication Code) is a method for verifying the integrity and authenticity of a message using a shared secret key. It combines the message and key with a cryptographic hash function (like SHA-256) to produce a signature. This signature ensures the request hasn’t been altered and comes from a trusted source — making it a common choice for securing API requests.
This approach differs from Bearer authentication in that it allows long-lived keys to be used. While Bearer authentication uses the username and password directly to be exchanged for a short-lived token, using the HMAC authentication method allows multiple pre-shared keys which can be secured independently in a secret store, eg. Vault or Azure Key Vault to sign requests. Since multiple keys can be stored for each user, 0-downtime key rotation is possible even with eventually consistent key storage systems. Every request must be sent with a signature in the Authorization header.
When to use HMAC Authentication
While the Bearer Authentication describes an approach which works well for development purposes, we recommend implementing production systems against the more robust scheme described in this document. Since keys can be independently secured and rotated, using the HMAC scheme provides tangible security benefits for operating a Taurus-PROTECT installation in business critical environments.
High Level Approach
This document covers, with working code examples and setup instructions, the following high-level flow:
- Generate an API Key in the UI which is used to sign requests.
- Compute an HMAC Signature and base64 encode it.
- Create an API request via with the signature in the
Authorizationheader.
Obtaining an API Key via the UI
Adding a new API key to a user using the Taurus UI adheres to the 4-eyes principle and will require participation of at least two users with user manager roles, typically your administrators.
- Log in as a user with user manager role privileges.
- Navigate to the
Usersmenu on the left navigation bar and open the details for the user you would like to generate keys for. - Expand the
API keyssection and select theHMACtab.
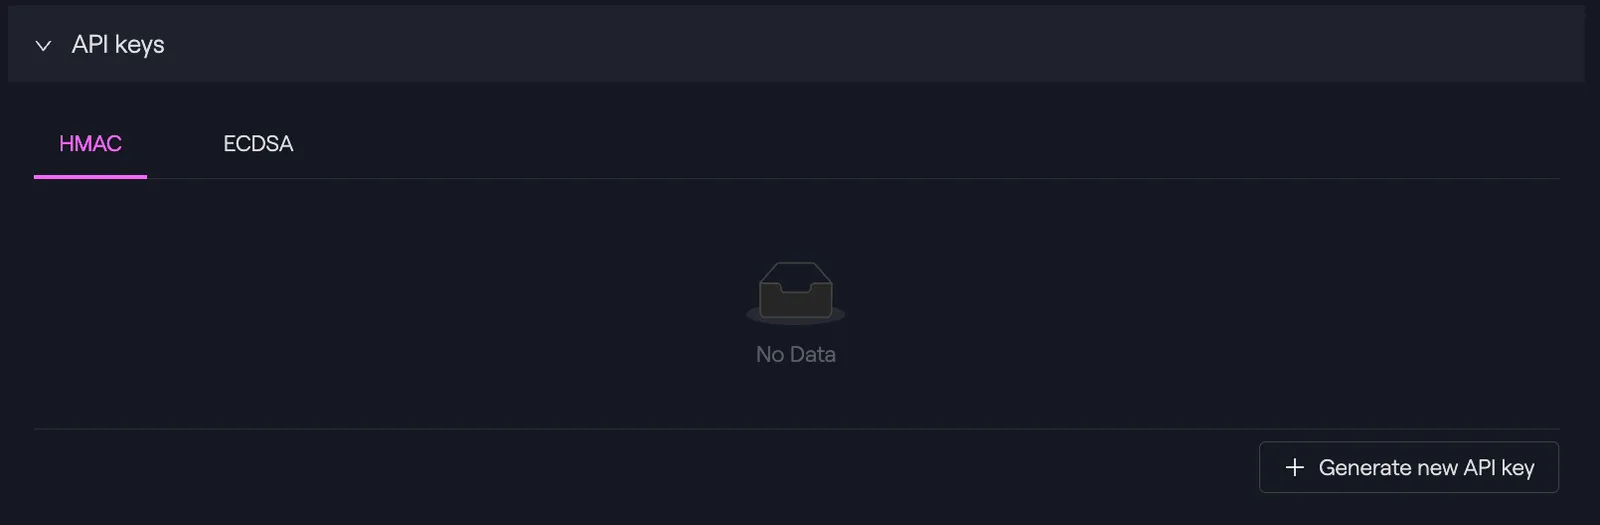
- Click on Generate new API key, which triggers a change request to create an
ApiKeyfor thisUser. This change request must be approved by an additional user with user manager role privileges (typically an administrator). - Log in with a different user manager.
- Navigate to the
Changes -> To Validatemenu and tab. - Approve the change request.

- You can now go back to the
Userdetails page where it will display anApiKey.
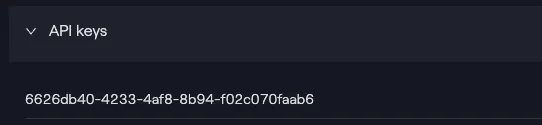
- Click on the eye icon next to the API key to reveal the secret.
Important
You will only have one opportunity to record the API key. Ensure you save this in a safe place. If the secret is lost, all the above steps must be repeated to generate a new key and the lost key should be deleted.
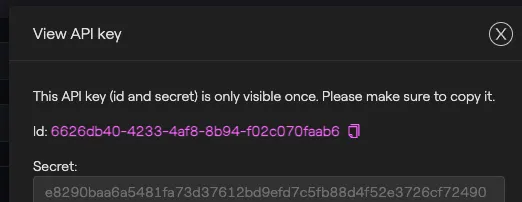
- Both the Id and the Secret, are required for signing a request. You don’t need to treat the Id field as sensitive data, but the Secret value must be protected. Make sure you store these in a safe place.
Signing requests using the HMAC secret
This section walks through the steps involved in generating and verifying HMAC signatures — including how to construct the message, handle timestamps and nonces, and securely transmit the signature with each request. Following these conventions ensures both sides can trust the integrity and origin of the data.
At a high level, to generate an HMAC signature you will:
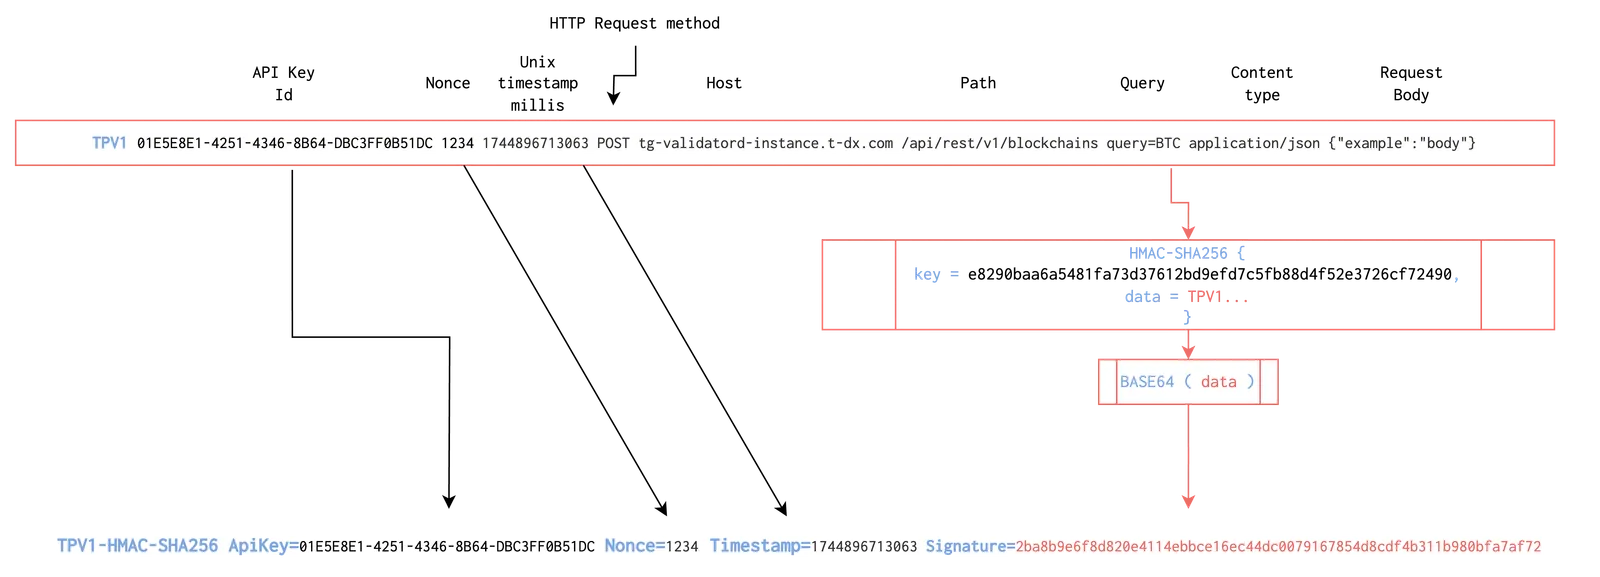
- Collect 10 pieces of information (called HMAC parts).
- Concatenate the parts with one whitespace character (
0x20) in the correct order. Skip empty parts (ie. do not use double spaces). - Generate a
HMAC-SHA265signature with the API key and the combined HMAC parts.
The HMAC Signature is made up of 9 parts plus the request body and the table below describes each part in detail. Note that parts 2,3,4 will be present in both the signature and the header. This is important for preventing replay attacks.
When using the Java SDK, HMAC authentication is performed through the ProtectClient class and its internal ApiClient object. Setting up API calls via HMAC authentication is as simple as follows:
Here’s sample code taken from the Java SDK that shows what is does internally to prepare the HTTP Authentication header:
- The to be signed parts are concatenated into a single string (in order matching the table above) separated by spaces.
- Empty parameters are removed such that the resulting concatenated string does not have two consecutive spaces.
- The string from step 2 above is then hashed and signed with a standard Message Authentication Code.
- Finally the Authorization header is created using the following format:
TPV1-HMAC-SHA256 ApiKey=... Nonce=... Timestamp=... Signature=...
Where TPV1-HMAC-SHA256 is a fixed string identifying the protocol. ApiKey, Nonce and Timestamp have to match the values that were used in the HMAC signature from step 3 and that same signature is also the value used for Signature.
The code above prints out the generated string to be used in an HTTPAuthorization header.
An API call done with the Java SDK ProtectClient will do all of the above for you.
Proxy Server for HMAC requests
For testing and to provide additional example code in additional languages, you can use the following http server proxy. It forwards incoming requests to the command line provided Protect API server and adds the Authentication header using the command line provided API key and secret.
Postman Pre-request script
In this section we provide aPre-request Script that can be used in the Postman graphical API workbench tool. Place the following script in the Pre-request Script section of your Postman Taurus-PROTECT setup, and make sure to store a valid apiKey and apiSecret in the Postman Vault. This requires a recent version of Postman, so please make sure to keep your client up-to-date.